If you're new in building a website for your business, I highly recommend using the most user-friendly and reliable platform - the WordPress.
First things first. Before you hop-in into its some advance features and capabilities. First, you need to know the basics of WordPress in order for you to understand how you can fully maximize its power in creating your website.
Now, Let's have a walkthrough inside the Wordpress Dashboard.
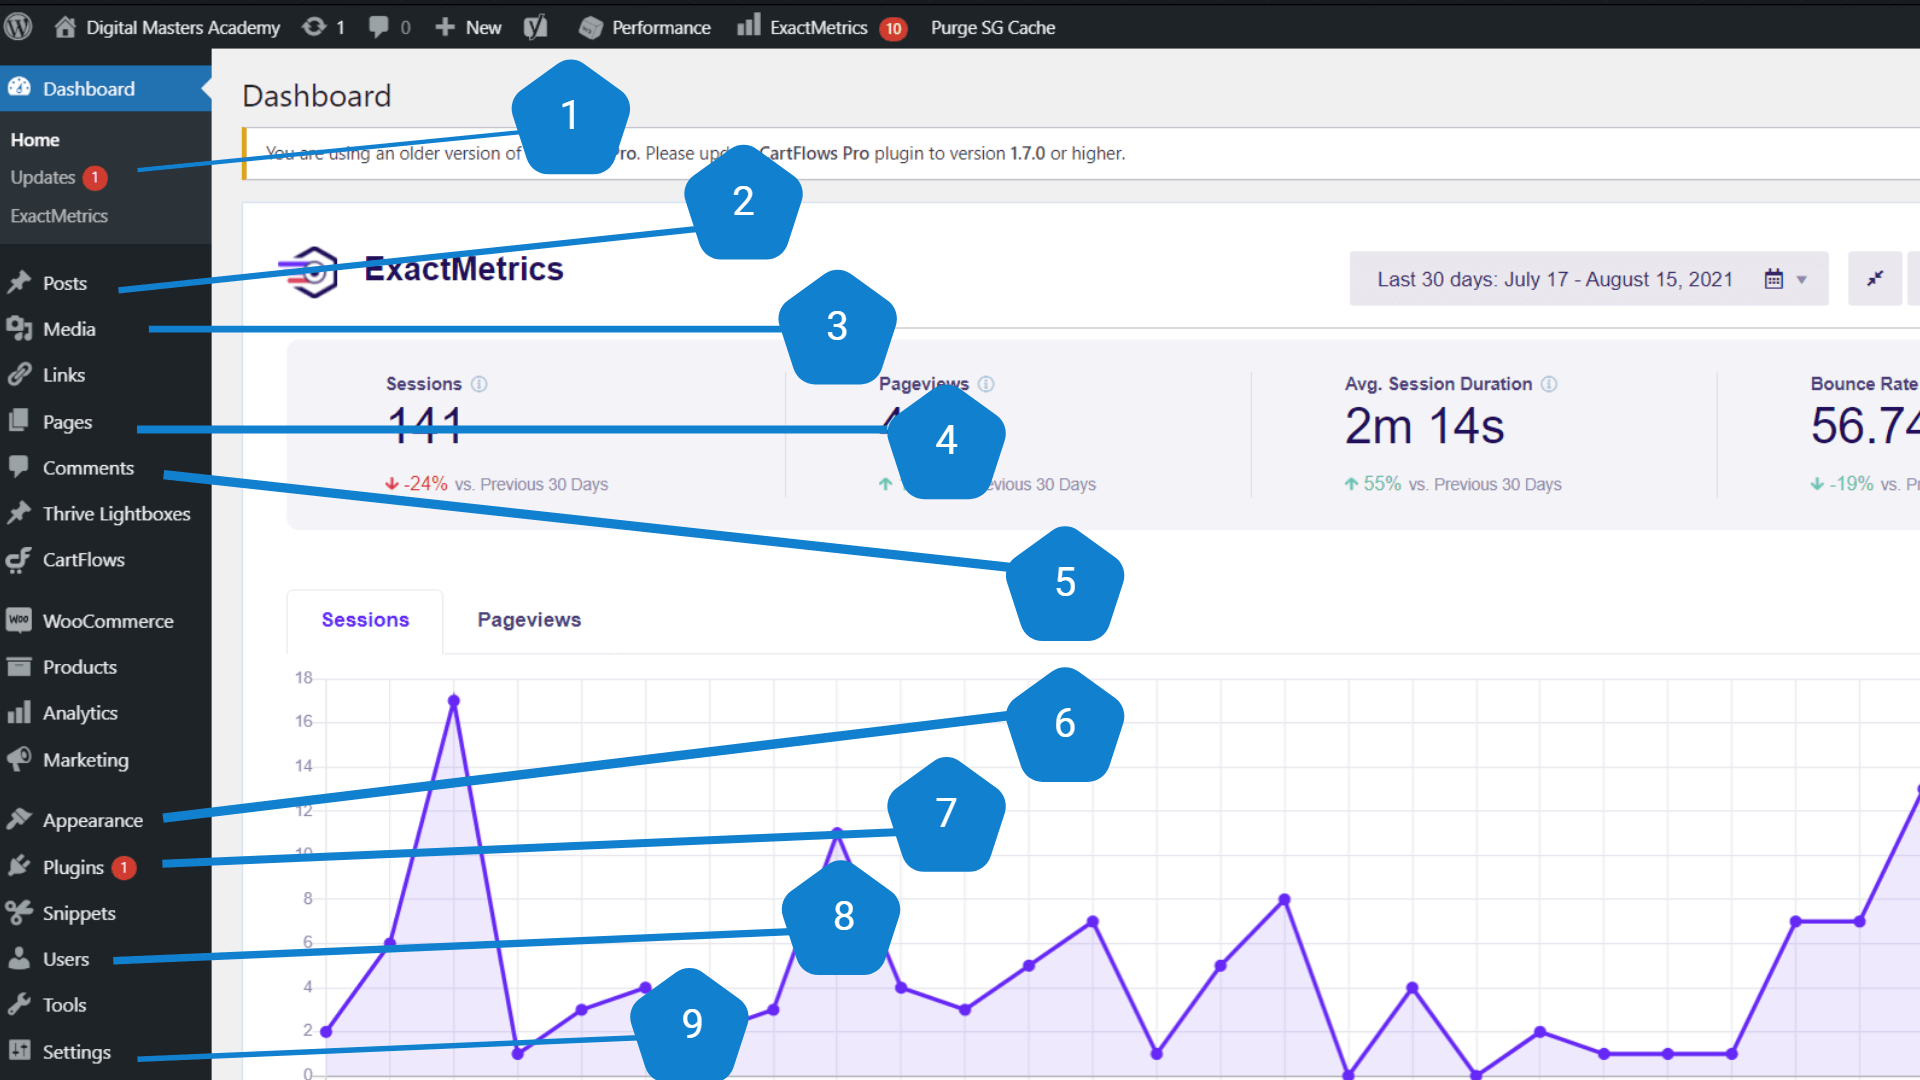
I put some numbers in the image so you will be guided on each options. I ONLY highlighted the basic stuffs. These are the things you need to understand the WordPress basics.
This is where you create your blog post - like the one you're reading right now. This is the only place where you manage all the articles in your website.
Below are the options you'll see inside the "POSTS"
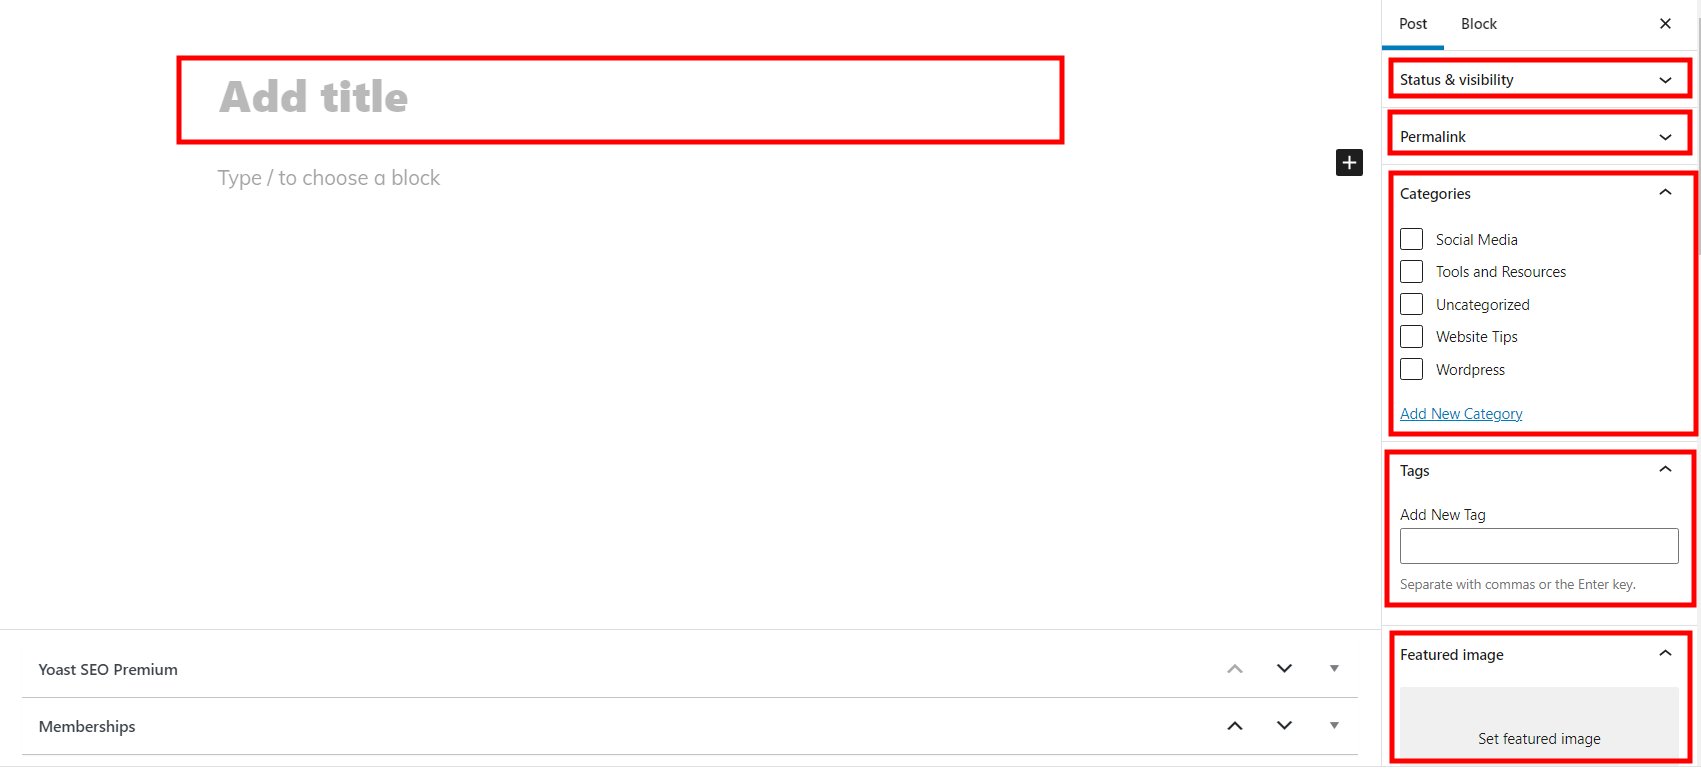
Keep in mind that the looks and feel of your post or blog is controlled by your theme.
This is the place where you ADD or upload media to your website. Media such as image, pdfs, worksheets and other files. basically, this is the library of all the resources you are using in your website.

PRO TIP: Do not upload video files directly to your website. It will affects it speed and performance. The best approach is to get a video hosting where you can just get a link and paste it to your website.
This is one of the most important parts of your website. This is where all the web pages are created. Though it is somehow looks like a post, it doesn't have the category feature and it can be control by a page builder.
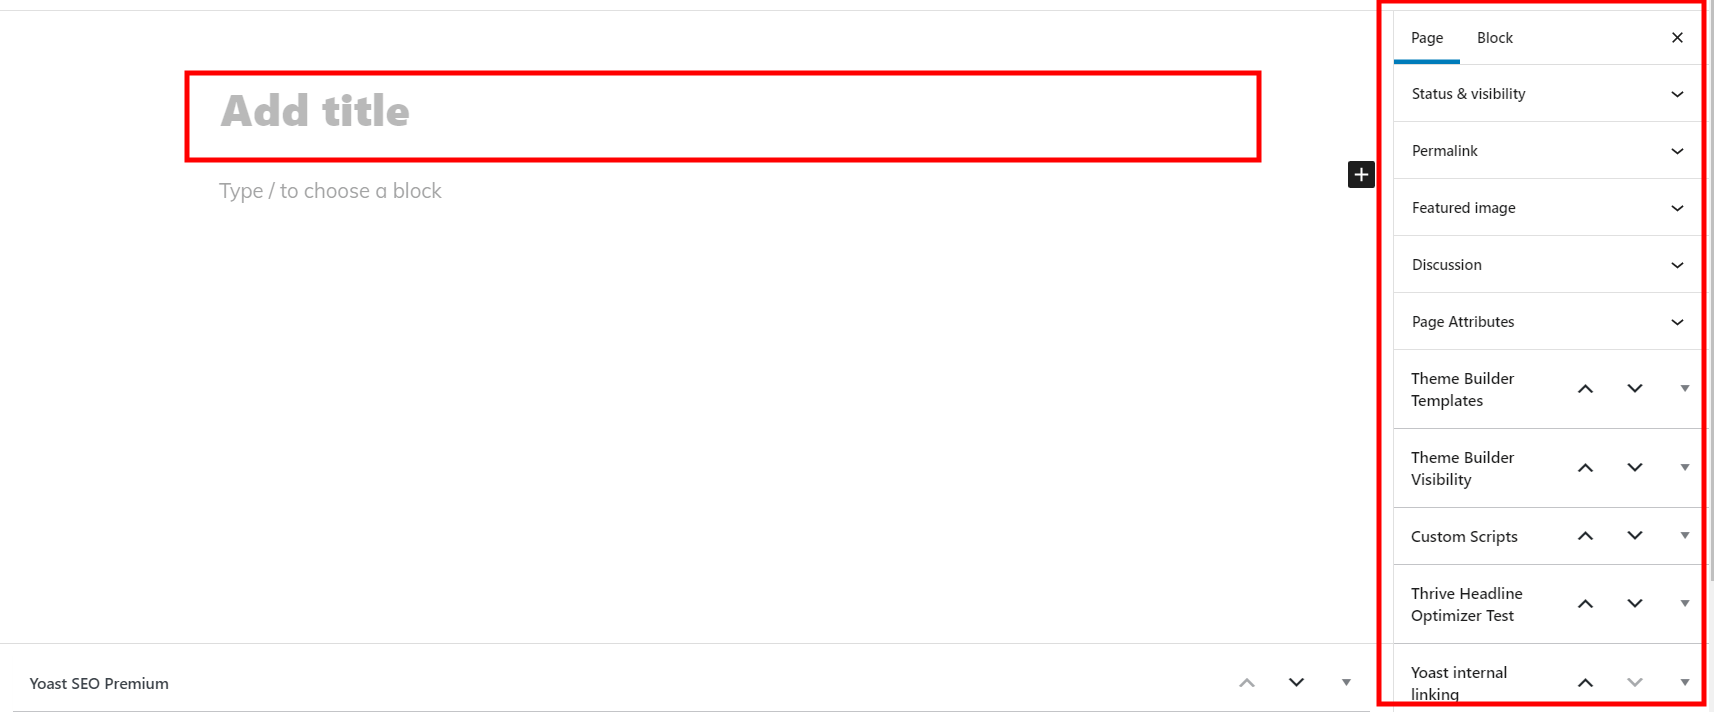
Since web pages can be customize by page builders, it allows you to modify and change everything the way you want it.
PRO TIP: When creating a title for your web pages, you can name it before your products. Example, instead of naming it as Landing Page or Sales Page, just put the name of your product so it will appear more professional when they view it on their browsers.
This part is where you manage all the comments from your blog article. Inside this option, you can approve, unapproved or mark as spam the comment.

Inside the Appearance section, you can find five more options. Themes, Customize, Widgets, Menus and Theme Editor.
THEMES
This is where you update, change or delete the existing theme of your website. Your theme generally decides how your website will looks like. The more professional-looking and user-friendly your theme is, the better for your audience to navigate within your site and for your to customize it base on your preferences.
This is the current theme I am using for my website. Check it out here.
CUSTOMIZE
This is where you can edit some of the basic stuff in your website along with your WordPress theme.
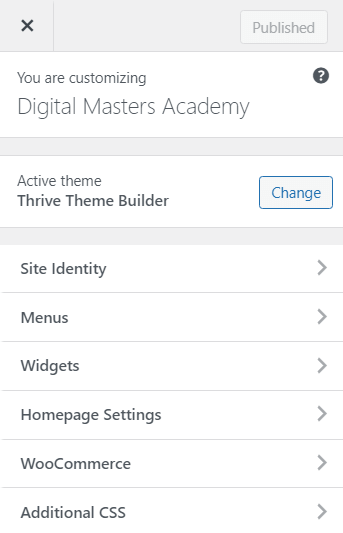
WIDGETS
This is where you can modify the sidebars, footers and other widgets in your web pages.
MENUS
This is where you will structure the menus inside your website. You can create multiple menus and place it in different part of your website. For example, the menu for our website look like this:

THEME EDITOR
This is where you can modify the code of your theme. And I advise you to not change any of this if you're not sure what you want to customize. This option is for advance user only.
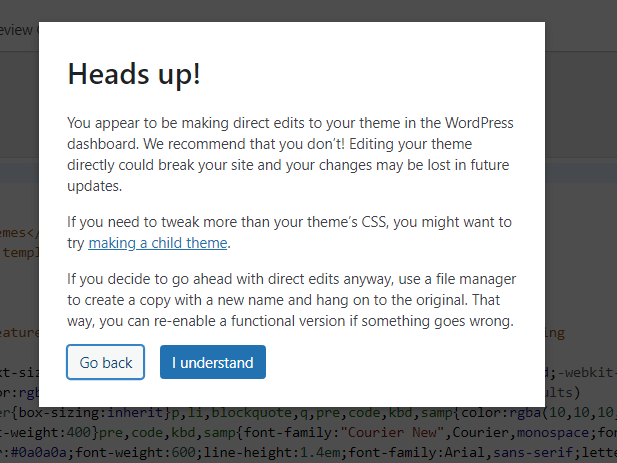
This is the warning you will receive if you tried to access the Theme Editor.
This is the section where you can manage all the installed application you're using in your website. Basically, all the features you want to add to your site can be done by a plugin.

Inside the Plugin section, you can deactivate, activate, delete and set to auto update your WordPress plugins.
Keep in mind that the more plugins you have inside your website, the harder it is to maintain and improve its performance. Make sure you only install the necessary plugins.
Now, here in Users section, this is where you can add other people to your website. You can set their role as Administrator, Editor, Author, Contributor or Subscriber.

All this roles have different capabilities: (source)
Administrator: somebody who has access to all the administration features within a single site.
Editor: somebody who can publish and manage posts including the posts of other users.
Author: somebody who can publish and manage their own posts.
Contributor: somebody who can write and manage their own posts but cannot publish them.
Subscriber: somebody who can only manage their profile.
PRO TIP: You can add multiple Administrator under your name by using different email address. This can serve as a backup just in case one of your Admin account got disabled.
Lastly, the WordPress Settings. Here you can control different section in your website. It also have sub-section - General, Writing, Reading, Discussion, Media, Permalinks & Privacy.
General
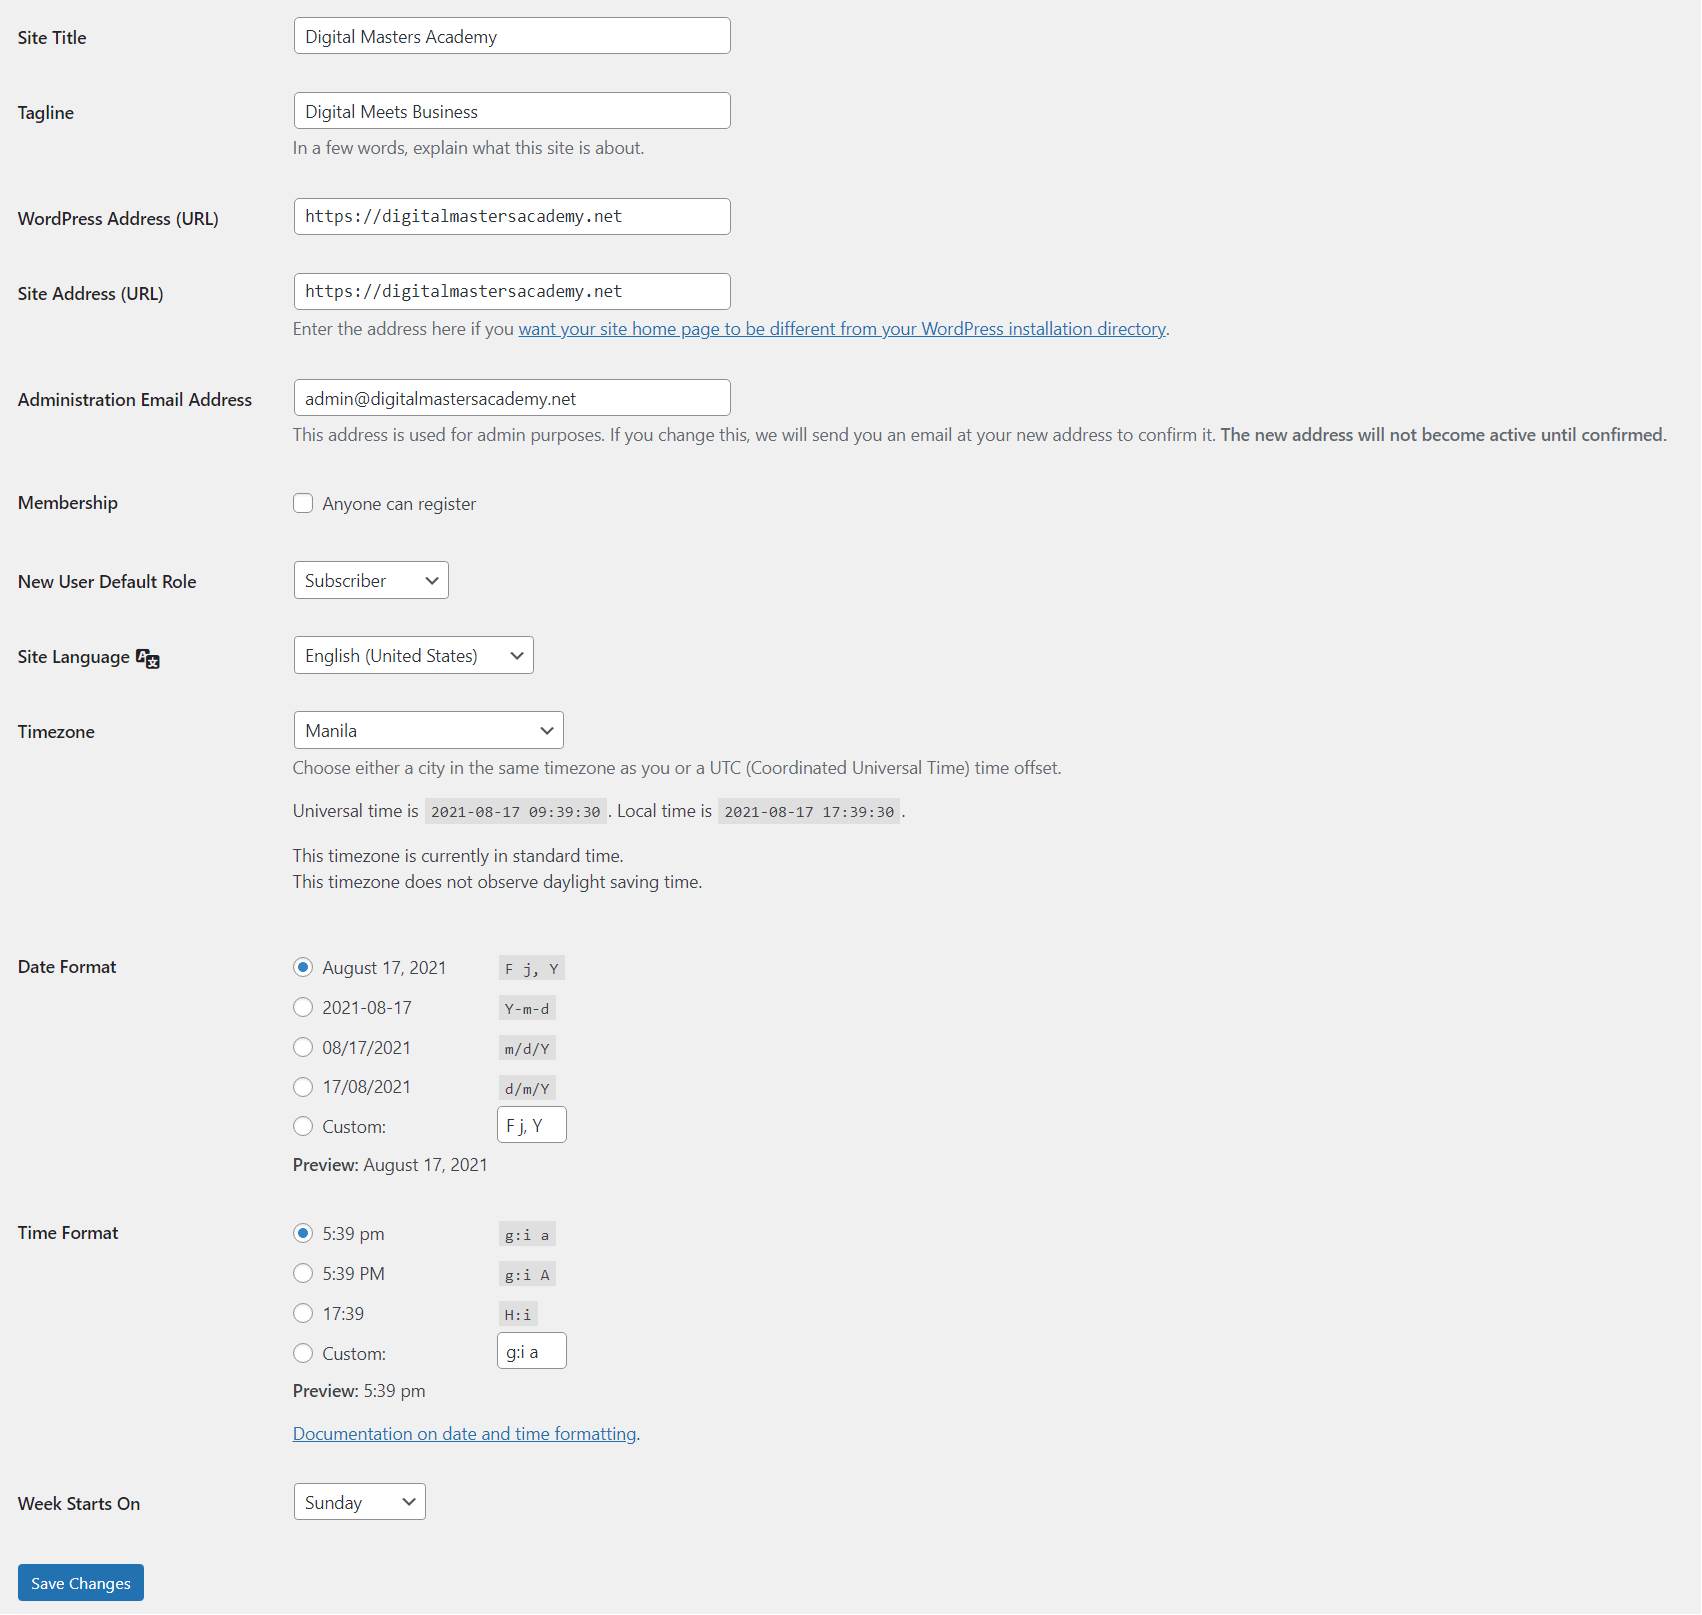
This is the default screen once you access the Settings section. It controls some of the basic configuration inside your website like Site Title, Tagline, Site URL, Admin Email and Dates.
Writing
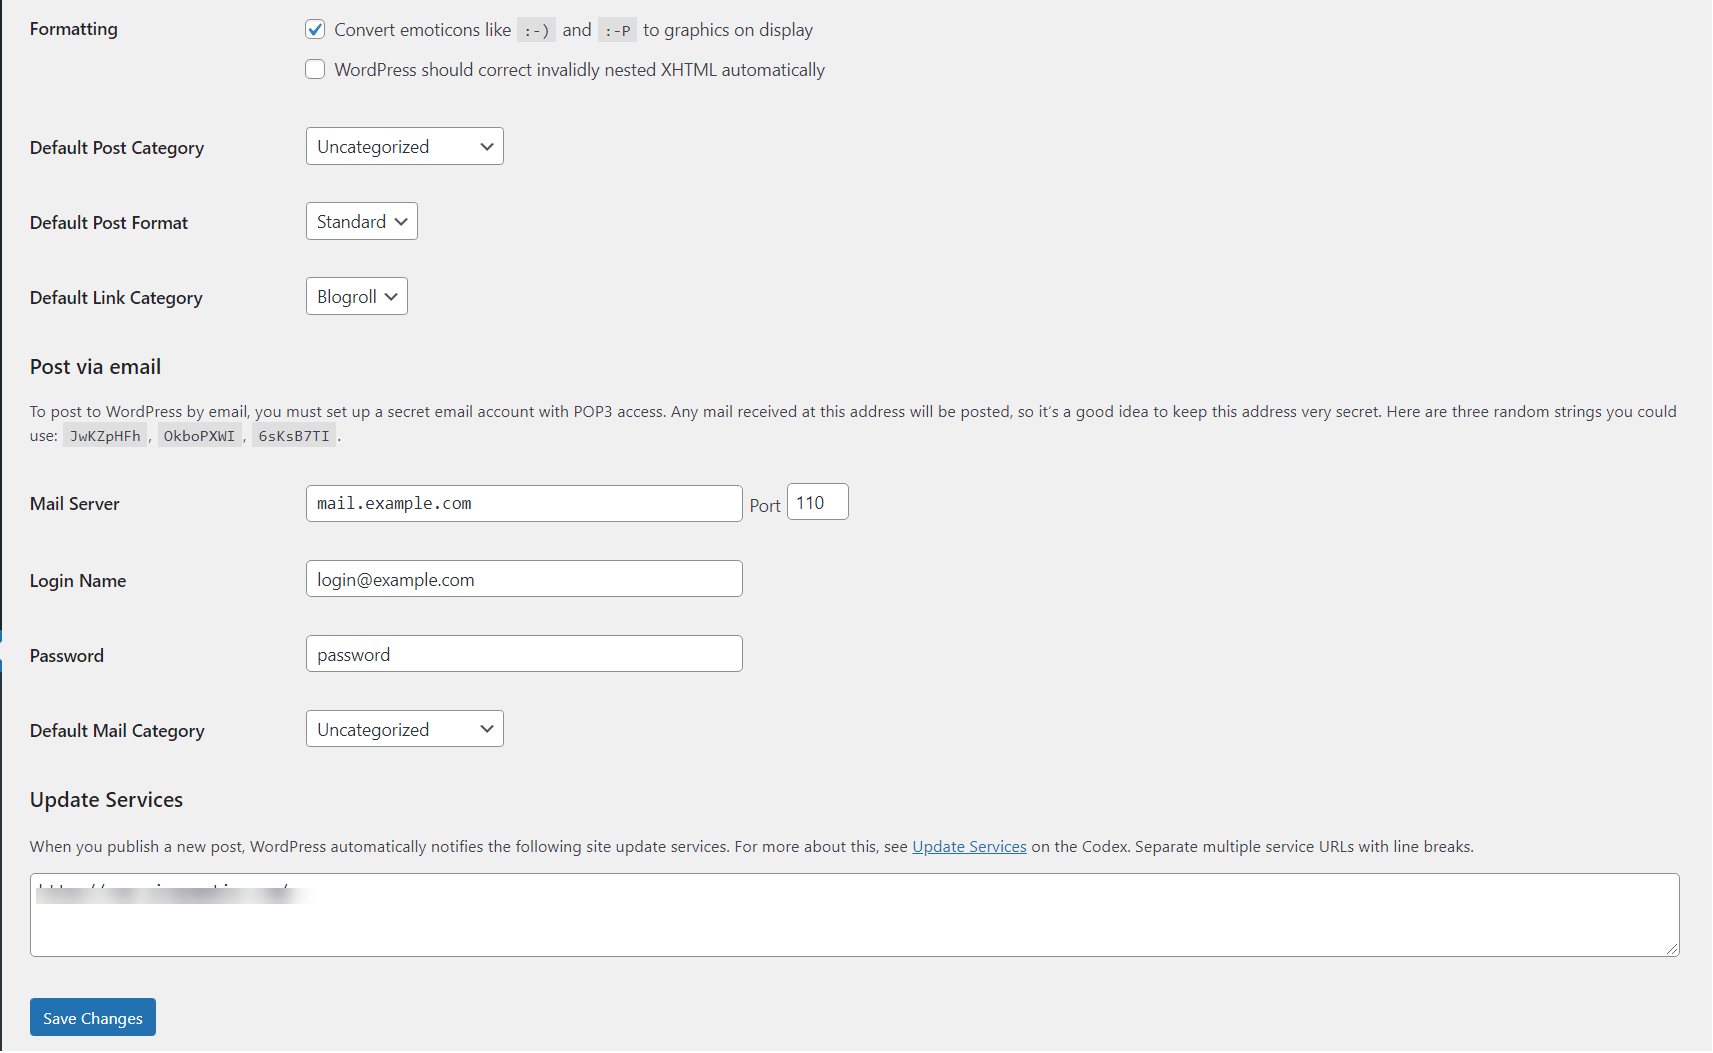
The writing settings controls the writing experience and provides options for customizing WordPress site. Basically, it is about the blog's post category and format.
Discussion
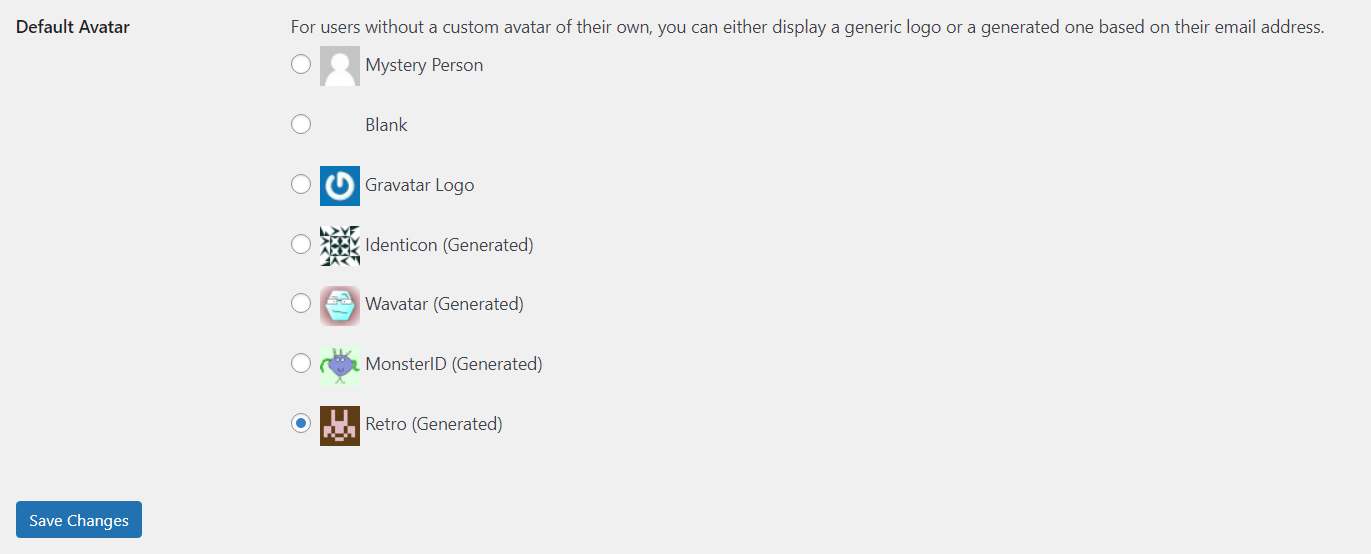
This is the section where the admin controls the posts and pages that come in through users. You can also set a default avatar for people who have access to your website but doesn't have a gravatar image set-up.
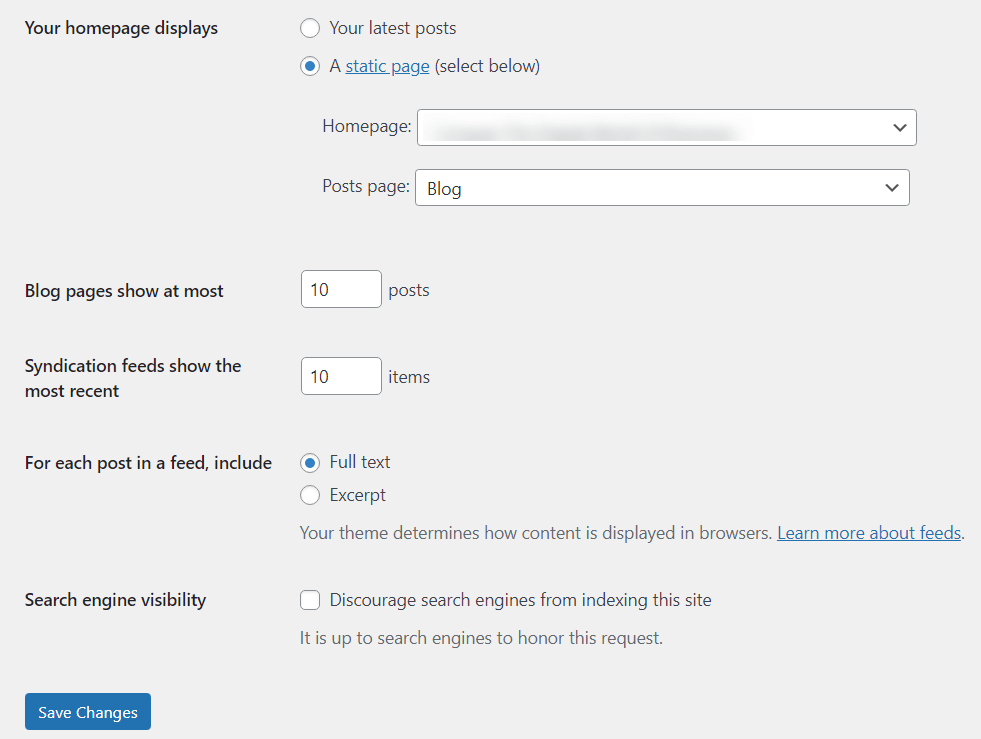
Reading
This section allows you to set the what are the pages that will appear in the front end - Homepage & Blog Page. You can also set the number of blogs to appear in a web page.
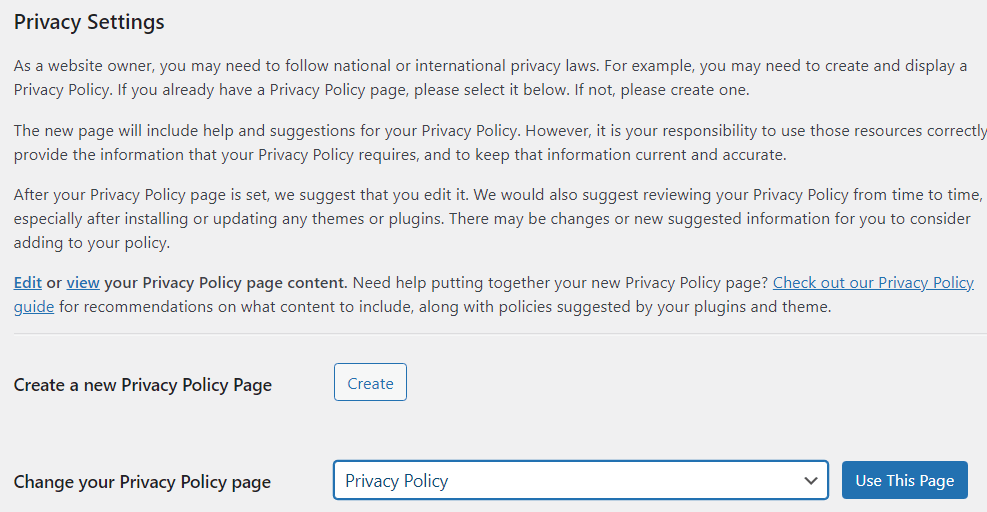
Privacy
This is the section where you can set a Privacy page for your website.
Thank you for reading this article. Always remember that you don't have to familiarize everything inside your WordPress website. What you need to understand well are just the basics.
Let me know in comment section how you enjoy this article. Cheers!


Informative